As seen upper left & right, Ampeg advertizement brochures state that 'The body is carefully designed and balanced for maximum playing comfort'.
Matt Umanov goes on to say "I originally thought the body was going to be styled totally flat, much like a Les Paul Special - but once the guitar was
put together and slung on, Dan felt some contours were needed on the body - much in the same way that Fender Stratocasters and
Gibson SG's are."
"Dan was always one to delegate things out to others, and after looking it over he turned to me and said 'put in some contours to make
it more comfortable'....so.......... I did!." Once Matt had finished, the body featured several contours that makes it a very comfortable
playing instrument. Although thin, the body itself has weight (approx. 8.25) and is carefully balanced for playing comfort. It's weight is such
that it keeps the guitar from being "neck heavy" which is the achilles heel of many thin bodied guitars on the market.
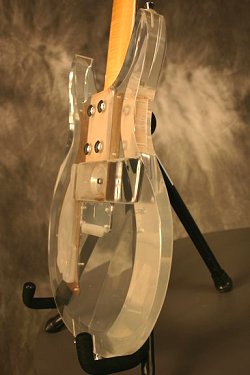
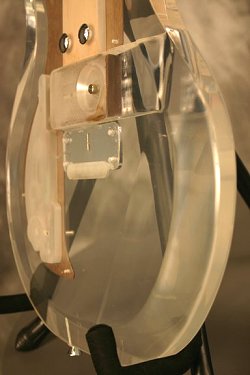
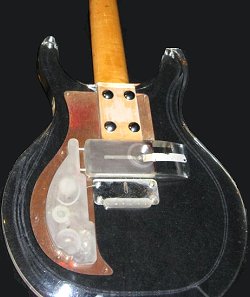
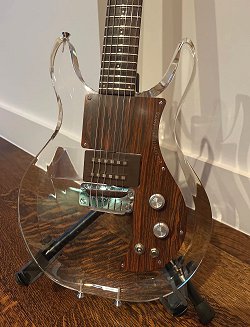
As can be seen above, the contours that Matt had styled into the guitar body for maximum playing comfort. While it is
seen here from the backside, notice too the contouring of the top side of the body made obvious by the line that can
be seen extending down from the corner of the routed pickup channel, or scoop, to the bottom of the instrument, between
the two strap pins. This section of the body is shaved down in thickness just enough to allow for maximum comfort when
the arm is cradled over the instrument and in the playing position.
As Dan began to experiment with the electronics, he soon discovered that it was going to take much more in order to
obtain all the sounds he wanted the instrument to produce. After consulting more with Bill Lawrence, Dan decided that
a series of pickups to cover a wider variety of sounds would be made for the instrument.
Thus began the concept of the interchangeable pickup. Dan's first design called for a total of six pickups to be made
available for the instrument. Each pickup had a unique sound and were numbered 1 through 6. To remove the Rock Treble
pickup you would loosen the strings, and snap out the pickup, then insert the desired pickup you want, and finally
bring the instrument back up to pitch. After awhile Dan wasn't too fond of this method stating "more than anything,
the guitar was designed to be a players guitar, and a stage guitar. Loosening the strings and inserting a different
pickup like that was too time consuming. I needed something that wouldn't force a retune every time."
The ink was barely dry on the various Ampeg brochures & literature when Dan decided on a modification to the body.
To accommodate his interchangeable pickups without having to detune the instrument, Dan had designed a sweeping scoop
or channel to be routed out of the body whereby pickups could slid in and out at will, underneath the strings.
According to Dan "The body was machined in Ampeg's factory" and is a double cutaway design. When compared to the
prototype (seen in the literature in the 'Brochures' section) the guitar body had changed significantly. The guitar was
now machined with the aforementioned slide in pickup cavity, along with the tone & volume control cavity which now
featured, a sporty new set of male banana plugs on it to connect to the pickups as they slid into place. Then there
was a cavity for the 'ball-ends'of the strings to lie in, and lastly, a cavity, or channel for the neck to lay into.
In addition to the slide in pickup channel, the other big design change was the alteration of the lower cut-away 'horn'. It had been
machined slightly different from the upper horn, to accommodate the curvature of the wrist that would result when a player tries to
reach the upper registers of the fingerboard.
Former Ampeg engineer Steve Constantelos recalls the manufacturing of the body, stating "we would get these big
sheets of acrylic in from, I think Rohm and Haas. The sheets were similar to a 4'X8' sheet of plywood only thicker and much
heavier. I can't quite recall the actual measurements of the sheets but once they were delivered to us we would trace
and cut out as many bodies as we could from a sheet, so as not to waste much. Then we went to work machining them,
as well as sanding and polishing them out afterwards."
Steve continues, stating "it was a lot of work but it really wasn't messy like working with a wood body where you
have all kinds of wood chips and sawdust laying around. The stuff really didn't make much of a mess when being cut or
sanded, and we had tools with vacuum lines attached, which sucked up most anything in one's way when tooling. You
needed good tools to work with it, and even then we were all constantly sharpening our tools as acrylic dulled them
in no time."
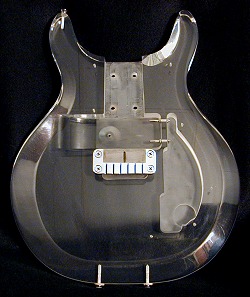
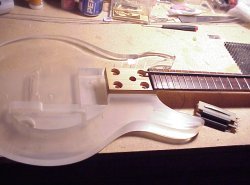
At left one can see the cavities mentioned above. Note the slot, or cavity machined for the neck to fit into. Also the screw holes for the
scratchplate, as well as a hole for the pickup screw that secures the interchangeable pickups in place. Also, the differences in the
machining of the cutaway horns can be seen.
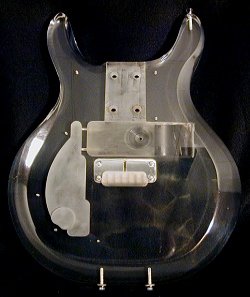
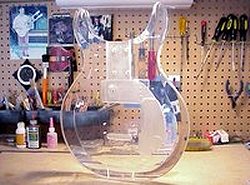
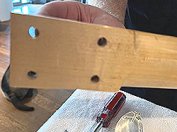
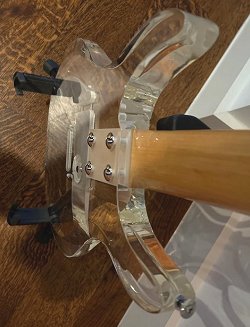
At the right, and as seen from the backside. It is here that the pickup screw gets inserted into the pickup once it is slid into place. Notice the circular,
indented, cone-shaped machining to keep the pickup screw flush with the back of the guitar. Four carriage type bolts get inserted into the back of the neck from
this side as well.
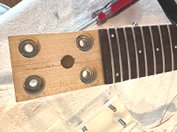
Bill Richardson pointed out something that I never noticed before. As can be seen in the upper left, the earliest
acrylic bodies were routed with a smaller, more shallow cavity for the ball end of the strings to lie into than later
models, seen at right. According to Bill "Dan had told me that players had complained that this cavity wasn't
routed deep enough nor wide enough for most players to easily attach the guitar strings. Actually this was a very
minor problem as all one must do is put a little bend in the string by the ball-end prior to installing a new string
and it will fit easily in the cavity. Still, Dan had respect for players opinions, and began to make this cavity a
little bit wider and deeper in the later models for players convenience".
Acrylic is also easy to maintain when it comes to scuffs. An early owners manual recommends a gentle buffing with
ordinary toothpaste and a soft cloth. The toothpaste acts like a mild abrasive and will eventually remove any scuffs, thus
keeping the body clear. "This" Dan once said "is the beauty of working with acrylic. On a regular guitar, if you
have a scuff you are stuck with it unless you refinish the entire guitar body. With my guitars you just buff away any
minor scuffs." However, for large area scuffs, or for full body polishing it is best when taken to a professional to be
buffed and polished out. The two phots below are courtesy of Mr. Bill Richardson.
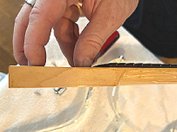
At left, and as Bill Richardson states "The acrylic Dan Armstrong guitars lend themselves to a very fine and slow series of wet
sanding underwater. The bass body shown here is just partially wet sanded - to more/less show the actual process." Notice the
lower half of the body is sanded while the upper half is yet to be done. Also notice an original bass pickup that has gone bad, lying
next to the body with the resin removed from it. Since the pickup could not be repaired, Bill has submitted photos of it and it can be
seen in more detail in the pickup section.
At right.... Wow! What a difference! After the wet sanding process, Bill then used a three stage process to power buff it all out.
As seen here, the acrylic body has been restored to its original luster. Keeping a Dan Armstrong · Ampeg instrument looking showroom new is
relatively inexpensive, and just one of the perks of an acrylic guitar body.

|
At left, Bill Richardson peers down the neck of a Dan Armstrong · Ampeg guitar after a good cleaning and buffing of
the acrylic body.
|
|
| .
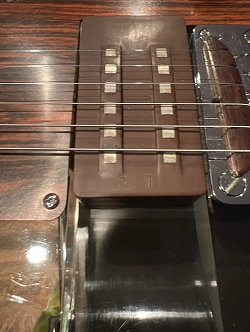
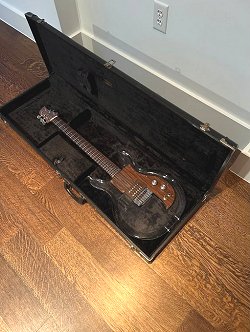
At left, and right, a very early Dan Armstrong · Ampeg guitar seen here sporting an ST pickup, which was obviously purchased later.
All photos of this instrument are courtesy of
HP.
|
| .
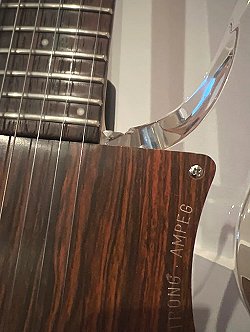
At left, and right, the smooth textured faux-wood scrathplate is consistent of an early model. Notice in both photos - a chipped off section
of the acrylic in the lower cut-away.
The owner looked all over the tongue of the neck looking for a serial number. When no number was to be found - he decided to break out a 'blue
light' as he suspected, judging by the look and feel of the tongue, that the serial number had been removed. According to him the blue light
definitely reveals that an abrasive, like sandpaper or something like it, had removed the serial number. The question is....... why?
|
| .
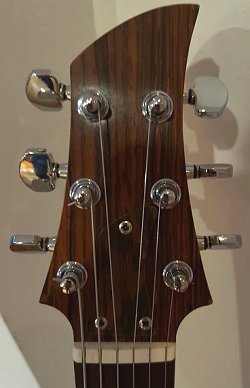
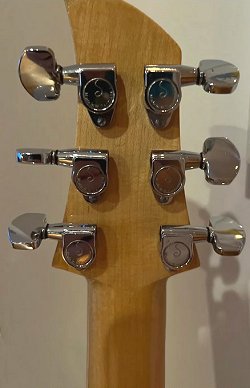
At left, and right, the headstock sports the Shaller tuners, again consistent with most of the earliest models.
|
| .
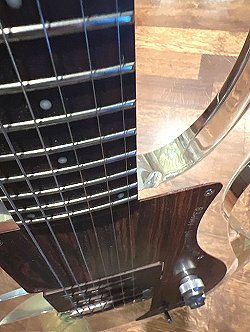
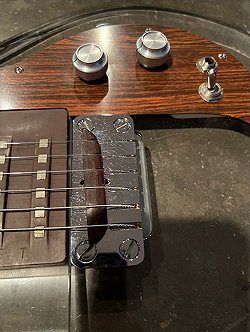
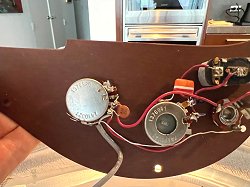
At left, and right, a smooth textured scratchplate, all chrome plated tailpiece, straight slotted tailpiece mounting screws and a rosewood
bridge with no fret across it - all typical of a very early model, with the exception of the ST pickup which Dan himself told me that he made
in 1970. Naturally it was acquired later.
|
| .
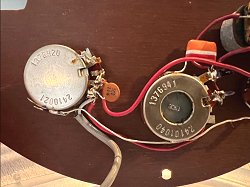
At left, and right, the orange/white/orange capacitor is a .033 microfarad Mullard tropical fish capacitor used in the earliest models. Across
the lugs on the volume control is a 500 picofarad capacitor used to maintain the highs (or treble) which is usually reduced when the volume
control is turned back, or down - also used on the earliest models.
The CTS volume pot reads a date of the 20th week (May 12-18) of 1969 - while the tone pot reads in at the 41st week
(October 6-12) of 1969 which would tend to suggest the instrument didn't leave the factory until later in October of 1969 at the earliest.
|
| .
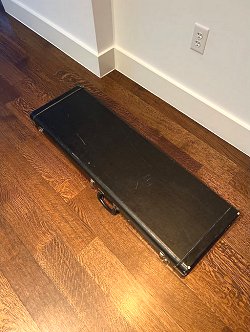
At left, and right, one thing not consistent to this instrument is the case. As seen here this style of case came later. To read more about
the differences in cases over time visit the Dan Armstrong Registry
here.
But once again the question remains.... why a later made case? The owner makes an interesting case .... stating "I can't help but wonder if
this is 'Keef's' stolen Dan Armstrong guitar. How do you sell such a hot item as this? Easy, you sand off the serial number (done). Then you
trade or sell off the old original case and acquire a newer one (done). Last, but not least you pull out the prototype pickup, acquire an ST
or any other stock type pickup for it (done). As a result of these changes the instrument can be sold off as anything but a stolen guitar."
It's obviously a 1969 model, but if you go back up to the photos of the volume and tone pots you will notice the tone pot reads that it was made
in the 41st week of that year which is the week of October 6 - 12. The Rolling Stones tour in America officially kicked off on
November 7th of that year. It would be pretty tough to go from CTS making the tone pot to Keith Richards being on stage in America
just one month later - unless Richards and Wyman received their instruments later. However, by the 6th of December the tour in
America had ended - so the time frame seems a bit too tight.
Definitely an interesting hypothesis to be sure. Unfortunately It seems unlikely as the time line seem to narrow. I'm thinking that Richards
and Wyman's instruments were earlier instruments, likely at, or near the end of the prototypes. However, even as it stands it's still a really
nice instrument.
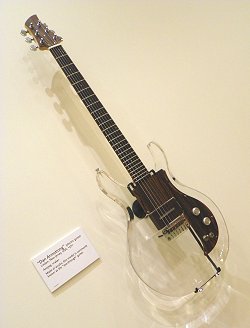
At left, today the Dan Armstrong · Ampeg clear acrylic guitar is on display in the Phoenix Musical Instrument Museum
which is the biggest museum in the world of its type including a collection of over 15,000 instruments from nearly 200 countries and territories in the world.
Other countries such as India, China, and Russia have multiple displays here as well, with subsections for different types of ethnic, folk, and tribal music.
Photo courtesy of Phoenix Musical Instrument Museum.
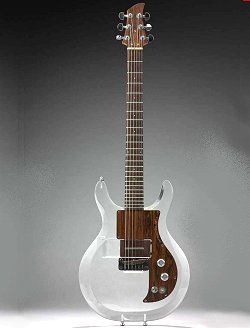
At right another Dan Armstrong · Ampeg model adorns the
Boston Museum of Fine Arts
collection where they state "By the 1960s
industrial designers had begun to incorporate acrylic plastics into the production of not only furniture, but also mechanical objects. The materials transparent
quality shed light on previously unseen inner workings, allowing them to be perceived as part of the overall aesthetic. Guitar designer Dan Armstrong may have
conceived this clear acrylic guitar as a way of emphasizing the inconsequential nature of an electric guitars body, as it has very little acoustical affect on the
instruments sound quality. The maple neck and rosewood fingerboard would have made the instrument feel more natural to players, but they also provide an attractive
visual contrast to the see-through body". Photo courtesy of Museum of Fine Arts Boston.
Naturally there are other electric instruments in most, if not all of these collections as well, but the inclusion of the Dan Armstrong · Ampeg
clear acrylic guitar serves as a lasting testament - and a reminder........ not only to current, but even future generations - as to the futuristic visions and
stylish design lines of Mr. Dan Armstrong.
continue
menu
Names and images are TMand © Dan Armstrong / Ampeg. All rights reserved.
All other names and images are TMand © of their respective owners. All rights reserved.
|
| |