At left and right, Tom stated "In addition to the scratchplate, I also ordered additional material to replace the original faux-wood veneer on the headstock as the original
veneer was damaged in and around the truss rod cover area. I believe this damage was the result of someone forcing the wrong type of tool into the truss-rod adjustment cavity to make
adjustments to the truss rod." Ironically this was a waste of time being the truss rod didn't even function.
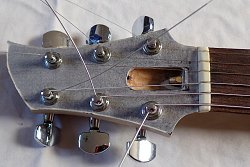
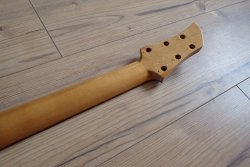
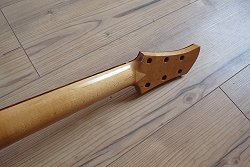
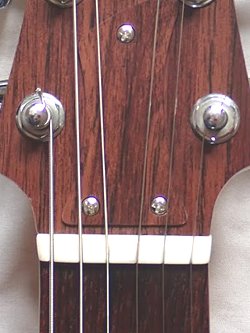
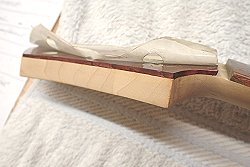
Angela states "The above photo's were a test fit of the headstock overlay that we made and fitted, which is why the white protective material is still on the veneer. The
original nut and frets were still on the guitar at this point." In the enlarged view, notice how the tuners are actually mounted on top of the white protective overlay.
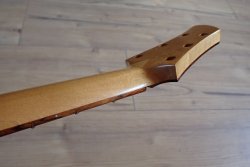
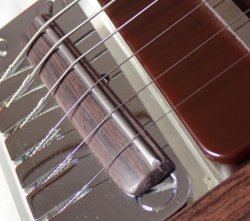
"We did, however test a 'plain' (no fret) rosewood bridge that we made as there were no bridges of any kind that accompanied this guitar." In the enlarged view, notice the
side of the new veneer which is white.
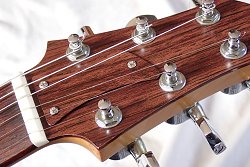
At left and right, and according to Angela "In addition to the headstock, we installed the neck to the body to assess the bridge/saddle height, and to check as to whether
the neck heel needed any work to increase or decrease the neck angle. Also, under string tension - we checked the neck itself as sometimes this causes minor forward neck pull, but
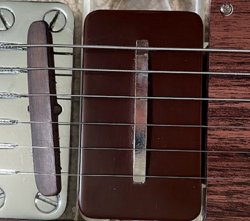
it was fine. We then checked the side to side neck angle/string alignment on both sides of the fretboard. Another thing we checked was the clearance of the strings above the pickup,
along with the position of pickup (side to side) so we could sort out the solder tags and contemplate a fixing method for the pickup. It was after all this that Tom decided to have
a full refret with fretboard surface dress, which then included a new nut."
|
Around this time, and using a piece of additional of faux-wood veneer that Tom had aquired in addition to the scratchplate, Angela had cut, shaped, and glued the faux wood veneer
onto the headstock. According to Angela, "The headstock face overlay was fitted before the final sanding/prep work of the neck so that it could be sanded back flush with the
headstock edges. In addition, I also stained the white sides of the veneer to match the top."
|
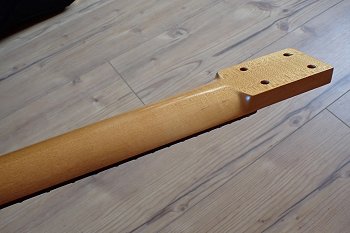
Above left and right, Angela stated "The maple neck was prepped and fine sanded then finished in a tinted nitro lacquer, with clear coats over it."
Angela then added "The tint was color matched to some of the original lacquer that was present on the heel area of the neck. Once dry it was buffed to a smooth semi-gloss."
|
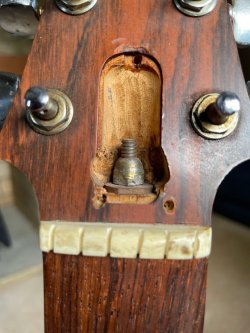
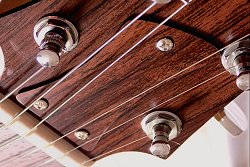
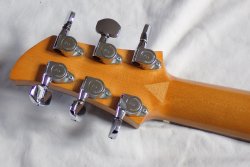
Angela and Tig cleaned and installed the original Schaller tuners that were on the headstock from the factory. After decades in a closet they had become rather dull
and dirty looking. With a little polish, elbow grease, clean shop rags & buffer wheels the tuners cleaned up nicely. Again, notice the meticulous job that was done filling
the hole that was in the back of the headstock.
|
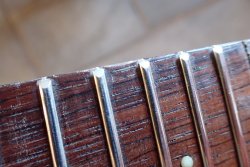
At left the original frets on the neck of Tom's Dan Armstrong. On the right, a closer, and better view of the original frets once polished. Although the polishing looks great,
Angela stated "The fretwork was poor, as the frets were not well seated, and as you can see, the ends are very much over bevelled which meant the outer E strings were prone to
popping off the fretboard edges."
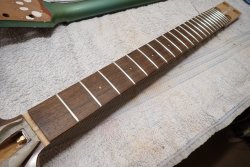
Above left and right, Angela and Tig complete a fretboard surface dress as well as a new refret installation. Back at the left, and better seen in the enlarged view, notice that
the protective cover over the headstock veneer has curled up and rests in and around the truss rod cover area.
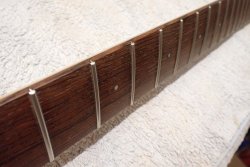
In addition to the refret, a new ivory nut was made and installed. At left, the original ivory nut can be seen. Strange as it may seem, and as Tom had mentioned earlier,
the string slots were all at an angle towards the right. The wonder is why a nut that's been cut like this was ever installed in the first place. At right, and with string slots
cut properly, a new ivory nut has replaced the original. Notice how seamless the new truss rod cover blends with the headstock veneer.
Tom had purchased additional faux-wood material for Angela and Tig to make a second scratchplate, headstock veneer and truss rod cover. Angela stated that
"We didn't have access to an original truss rod cover so we had to scale one from some 'straight on' photos that we found online. The cover was made from the same pickguard
blank material, but we thinned it down."
|
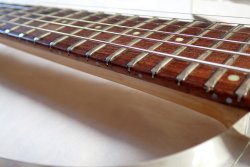
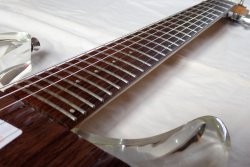
With everything in place the guitar gets tuned up once again. In the enlarged view one can easily see that the fret ends are not massively beveled like before, thus allowing the
player to access the additional playable area of the rosewood fingerboard and allowing the player to access the outer 'E" strings without the worry of them leaving the
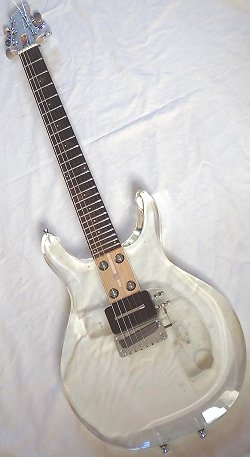
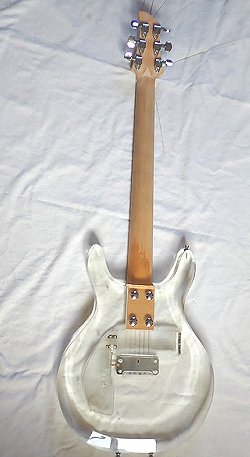
fingerboard. Notice too..... that the new scratchplate has a clear plastic protective cover over it as well as a white sticker type label on it.
|
Tom stated "Angela made me a pair of new bridges as the instrument did not come with any. One is solid rosewood like they were in 1969, and the other one has a fret on it like
the 1970/71 models)." In the enlarged view notice the exceptional worksmanship.
next
menu
Names and images are TMand © Dan Armstrong / Ampeg. All rights reserved.
All other names and images are TMand © of their respective owners. All rights reserved.
|
| |